Firefox proxy settings feature allows you to configure many types of proxy settings. You can add system default, set your own manually, and also it has an auto-detect proxy setting feature. Before starting how we can configure the Firefox proxy settings, we should know why proxies are used around the world. Some of you may know and some of you may not but I’ll just explain a bit.
Proxy is an intermediary part between your Computer/PC and the internet. It checks all the request made to the internet by your browser. It tries to fulfill them using its cache. Proxies are widely used to hide your PC from the internet for security, improve the performance and filter requests. They have used by the organizations, ISPs, and corporate firewalls.
If you want to use a proxy for your work purpose, then take those important credentials from them and follow this guide until the end.
Steps to Configure Firefox Proxy Settings
Follow the steps given below to open and Firefox proxy settings configuration panel:
Step 1: Click on the ‘Open Menu’ button at the top-right corner of the Firefox and select ‘Options’.

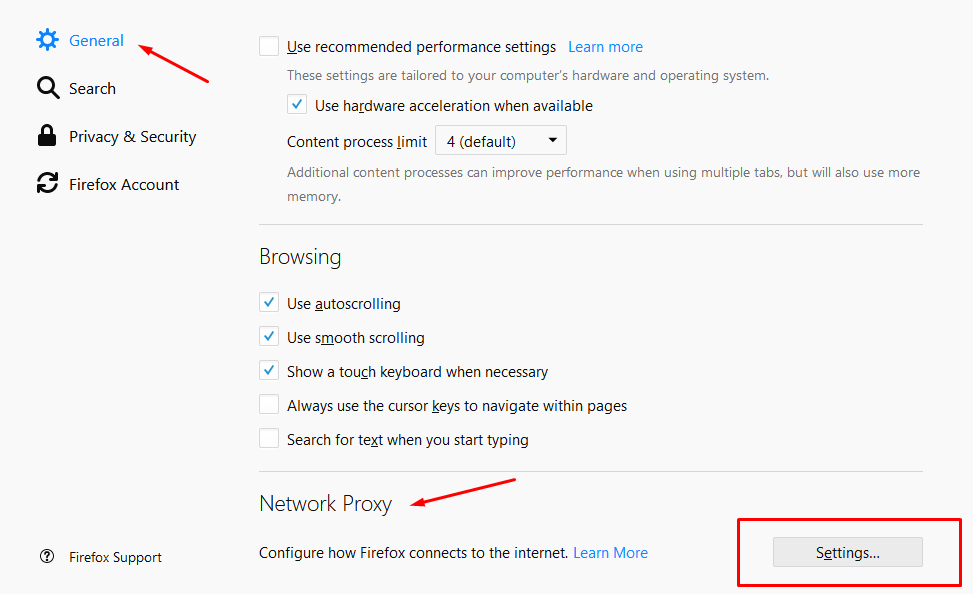
Step 2: Under the ‘General’ panel, scroll to the bottom and find ‘Network proxy’. Click on the ‘Settings’ button. It will open up a new popup of ‘Connection settings’.
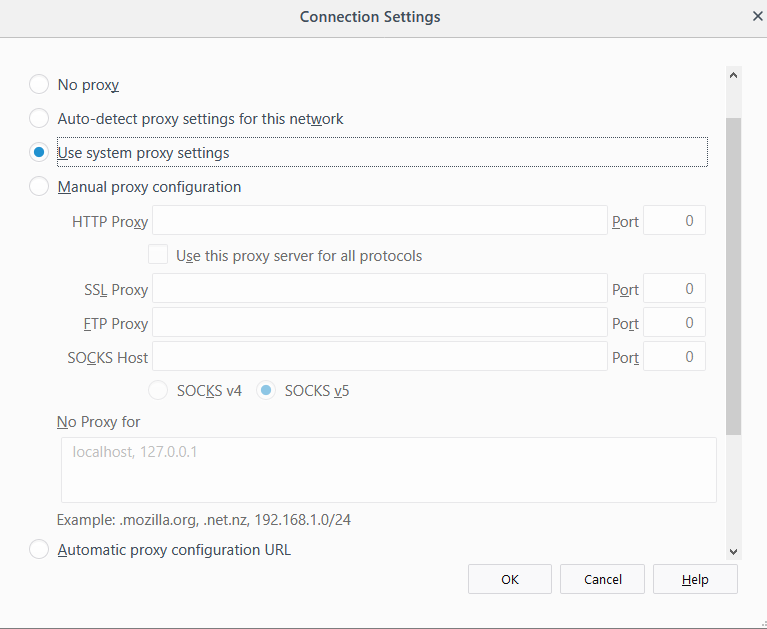
There will total 5 configuration settings which you can select. But let’s know them first:
- No proxy: This option does not use any proxy for your browsing and hiding your PC from the internet.
- Auto-detect proxy settings for this network: This allows to automatically detect the proxy settings for your current network in Firefox. Firefox will use WPAD protocol (Web proxy auto-discovery protocol) to detect a specific proxy.
- Use system proxy settings: This option will use the system configured proxy settings in your system. If you do not have set any proxy, then Firefox won’t use any proxy.
- Manual proxy configuration: This one allows you to set custom proxy settings manually in the Firefox.
- Automatic proxy configuration URL: This option allows you to add proxy URL to configure the settings and use this URL to check requests.
Manual Firefox Proxy Settings
Step 3: Here we are going to use the ‘Manual proxy configuration’ to configure Firefox proxy settings:
- Enter the proxy server address in ‘HTTP Proxy’ and port number as shown below. This will be different for every person. Below is just an example to do it.
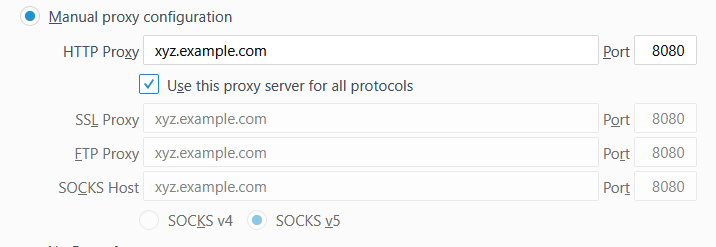
- Check the option ‘Use this proxy server for all protocols’ to make it the same for SSL proxy, FTP proxy and for SOCKS host. You can set manually if you want.
- If you are setting the SOCKS proxy then you can leave the SSL proxy, HTTP proxy, FTP proxy boxes. Just enter the SOCKS proxy and its port number.
- Firefox allows you to bypass proxy for some sites. There will be a ‘No proxy for:’ box in which you can add the sites. Just add the site name as shown below followed by space. By default, there will be the local address which means the addresses are pointing to your local PC itself.

If you found any proxy server error like ‘Unable to find the proxy server’, then you need to go back and disable the proxy server. Your error will be resolved and internet will start working fine.
Also Read:
How To Turn On Safe Mode In Mozilla Firefox